
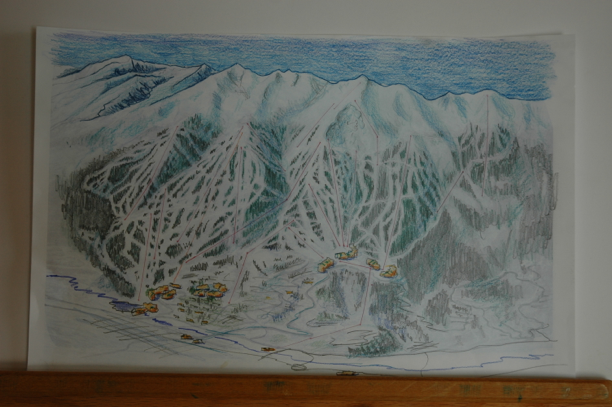
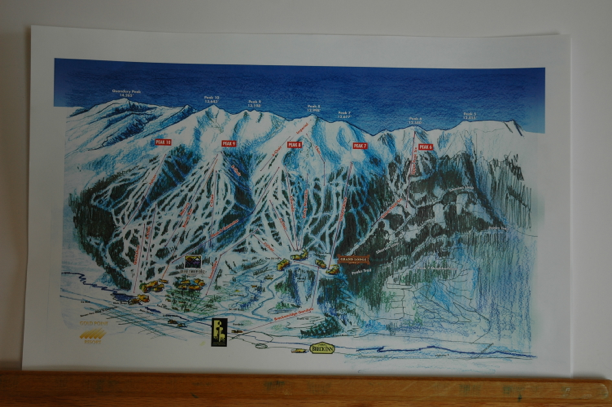
Breckenridge Ski Trail Map
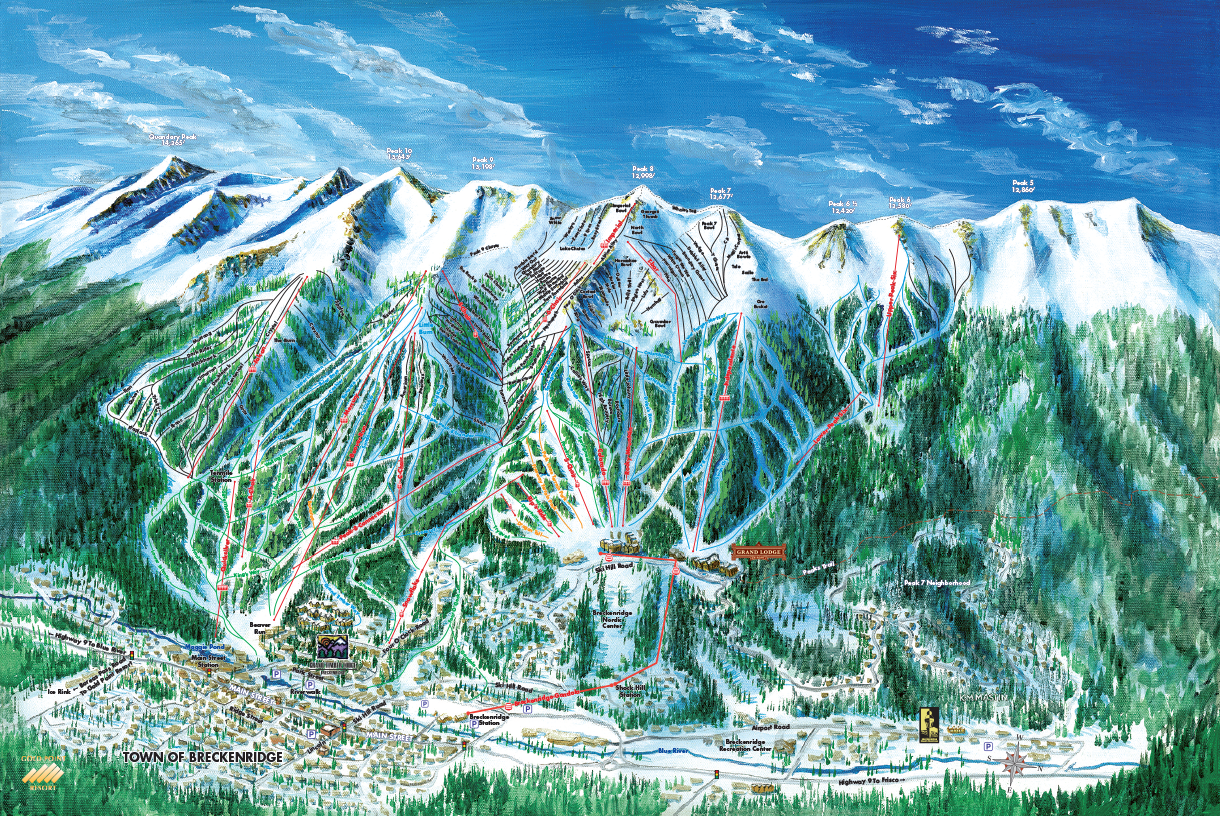
Breckenridge Grand Vacations needed an accurate map as a sales tool for their projects up on Peak 7 and their new projects on Peak 8. With the new expansion plans on Peak 6 (which weren’t represented on any existing material) they called on me to paint a custom map specific for their properties. What an awesome project — thanks!
From concept to reproductions
One of the advantages I’ve had over my competition is that I still actually draw and paint. Many graphic designers these days are computer jockeys and don’t work the sharp end of a pencil, or a soft kneadable eraser. I went to art school to be an illustrator. But at that time (1986) the industry was quickly changing and there was a huge need for people to learn electronic publishing, so I jumped in early and was lucky to learn on the Mac with versions 1.0 of Pagemaker, FreeHand, PhotoShop, Quark, etc.
Projects such as these ski trail maps fit me uniquely well, in that I have the ability to plan, sketch, draw, paint, scan, color correct, add digital overlays, print giclée reproductions and stretch the canvases—the whole enchilada!
Ski Trail Map Process
A number of people have asked me how I do the maps, so I thought it’d be fun to track the process.
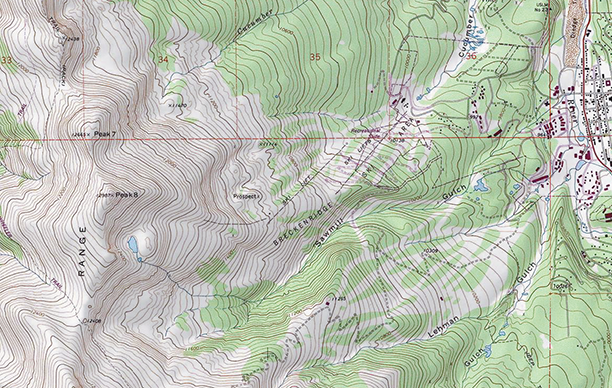
Map junkie—I’m a runner, hiker, hunter and climber; I’ve spent countless hours reading and making custom maps. I always start with my favorite map: the 7.5 minute USGS quad. It’s simplicity is elegant and it tells the whole story. In my mind I can picture the topography based on the contours. Years ago I relied on hiring a sketchy little airplane and flying over to take my own aerial photos. Nowadays, there are so many current satellite and aerial photos available that I can find most of the backup reference materials I need via printed maps or the internet. That said, I do still take my own “on-the-ground” reference photos for terrain, buildings, trees, color, etc.
Sketch
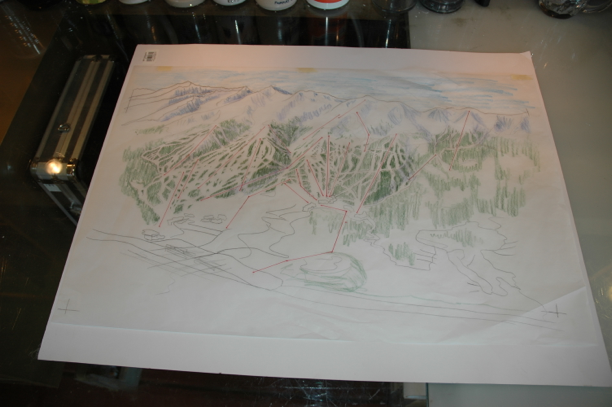
The first sketches are incredibly important. I can usually have a pretty good image in my head, but people are visual, and getting the proportions down early can save hours of headaches later. I like to work with colored pencils on tracing paper.
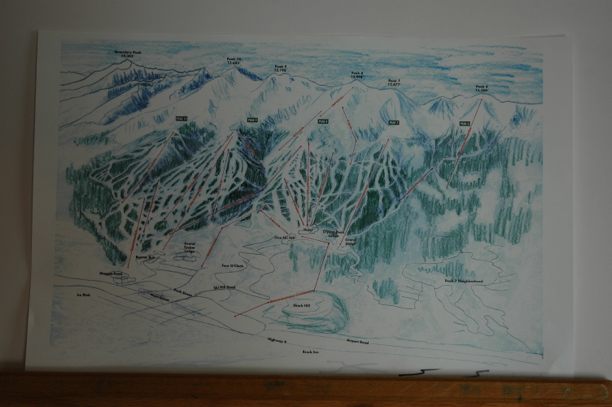
I’ll shoot a few digital pictures, toss some labels on top and e-mail them to show progress.
At this stage it’s easy to move things around and rework areas without redrawing the entire sketch. Here they wanted the runs to be longer in proportion to the area above timber line.
And here, I’m just working out some details on the new Peak 6 area.
This is as far as I needed to go with the pencil sketch in order to get the go ahead on the painting.
On to the Painting
My sketches are rarely the same size as the final painting. I know that’s unconventional, but I do it that way for a number of reasons:
1) Speed. Oftentimes the final will be quite large (this one will be a bit smaller at 30″ x 20″), but sketching large is slow; sketching small is quick.
2) Efficiency. My desktop scanner is only 11″ x 17″. If wanted to scan a quick proof and e-mail it, I’d have to scan it in multiple sections or shoot a digital photo (which wouldn’t be as fast or as crisp).
3) Laziness. I have the luxury of my big printer and a light table and I use them—a lot! I can take a small sketch, scan it and reprint it at any size, then I use my light table to tighten it up at actual size to prepare for the final—much easier.
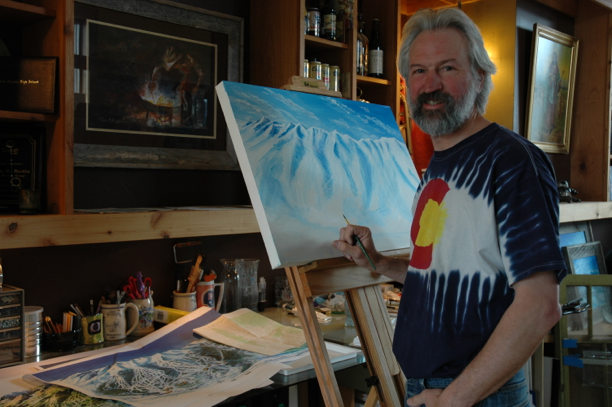
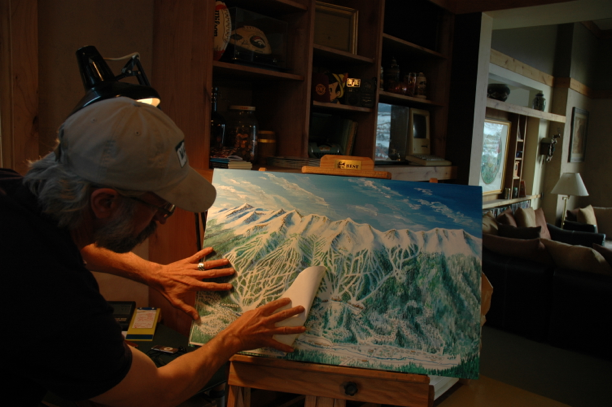
Aaah! A blank canvas. Now the fun begins.
The hard work is behind me. This is the best part. I love the process of adjusting the height of the easel, pulling out the paints, filling the water jug.
Here’s my sketch printed at actual size. I’ll use this as my guide as I go along.
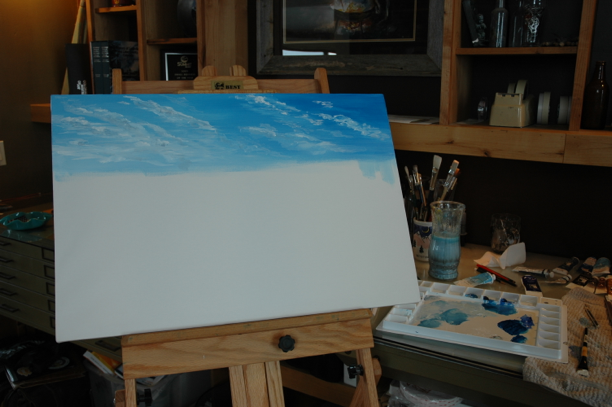
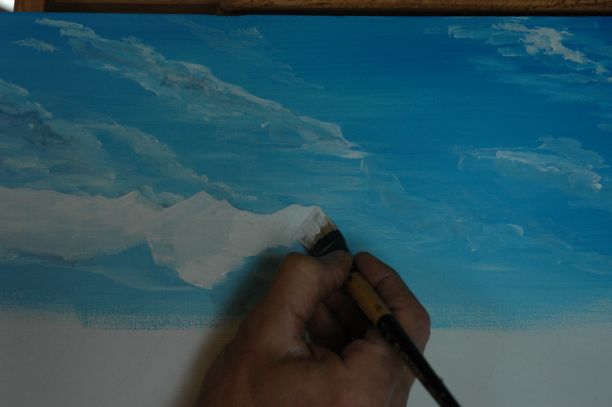
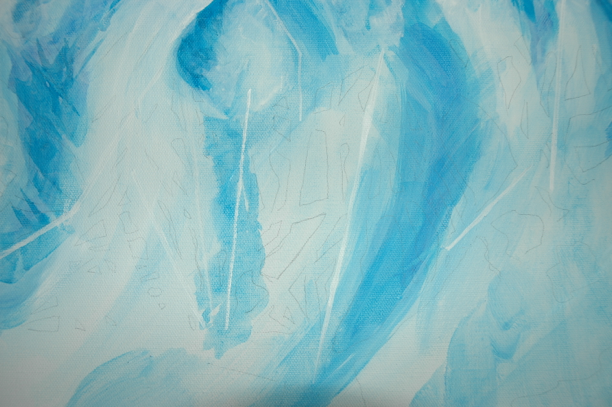
I find the point at which the sky needs to extend… make a mark on the canvas and paint down to it.
My light source on this one is lighter from the south on the left and darker to the north on the right.
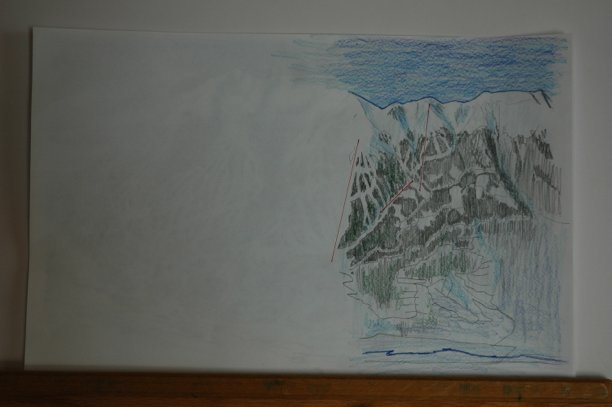
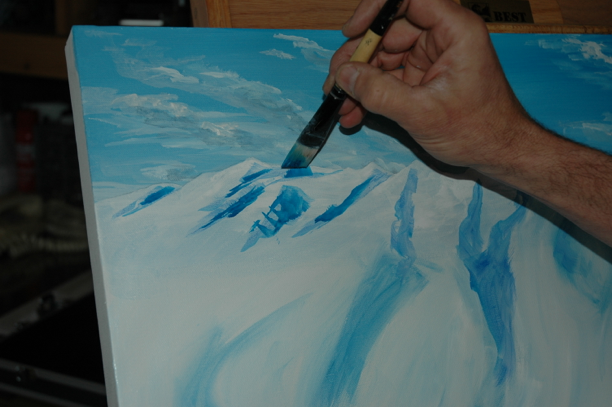
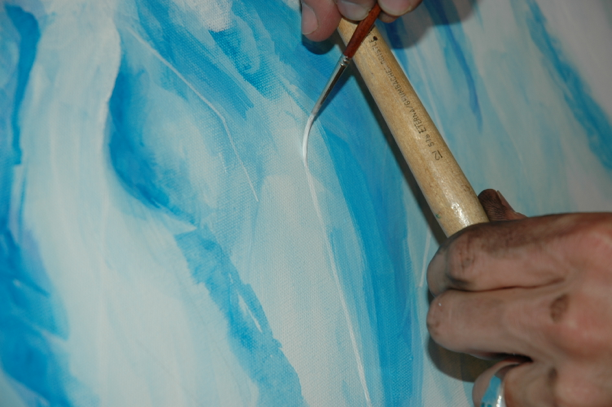
It’s very important that the ridgeline is accurate, so I use graphite paper to transfer that line to the canvas.
Here you can see the graphite on the canvas, I’ll paint just below that line and use a kneadable eraser to clean it up later.
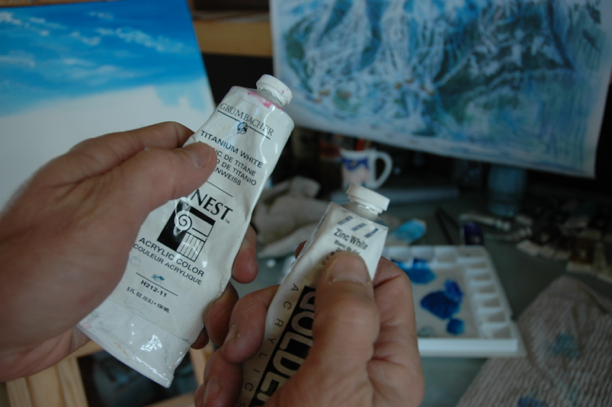
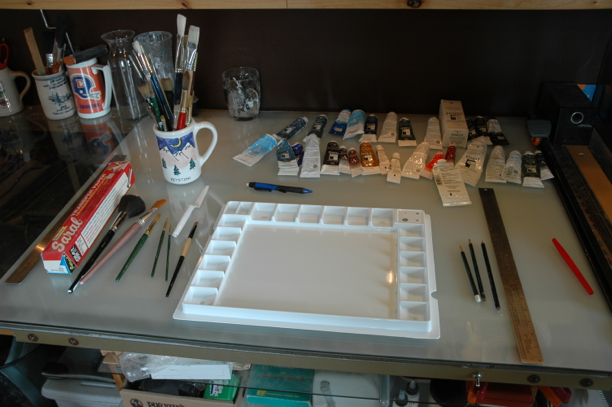
Note on some paints: I use two different whites—Titanium and Zinc. Titanium is very opaque; it’s great for covering darker colors and making pastel colors from more intense colors. I’ll use it to paint the snow as it will easily cover the blues in the sky. Zinc is transparent and allows other colors to show through—also called “glazing.”
From this point I can paint freely for a while, laying down some cool blues to find the northern shaded areas, using my sketch as a guide. This is the stage of the painting my good friend Margie, describes as my “mashed-potato period.”
I like to stick with a large brush for as long as possible. Now is no time for detail, and small brushes just slow things down. Acrylics dry reasonably fast (and I don’t use extenders to lengthen drying time) and if I don’t keep moving the paints get sticky.
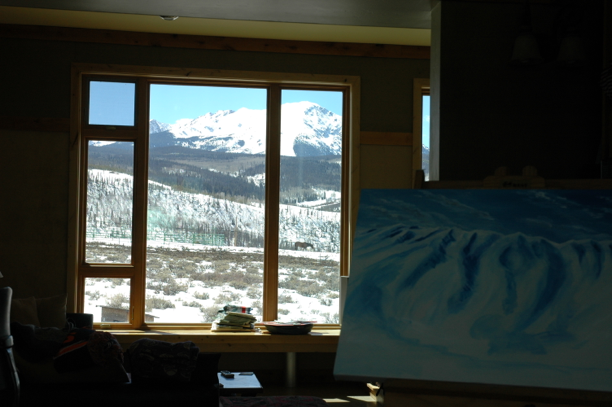
Quick stop—it’s so pretty outside! You can see the view of the northern Gore out my window—that’s one of our horses, Big Fella, out there by our riding ring.
I use a lining brush to layout out the lift lines, again these need to be very accurate.
Back to tracing the tree pods onto the canvas using graphite paper.
Here you can see the graphite marks where the tree pockets will need to go.
By the way, I almost always paint standing up, moving my easel up and down as needed.
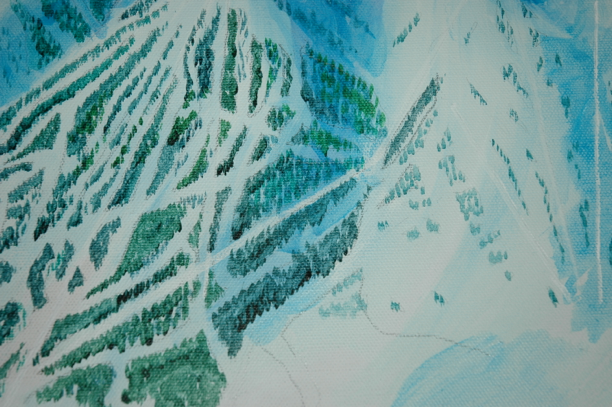
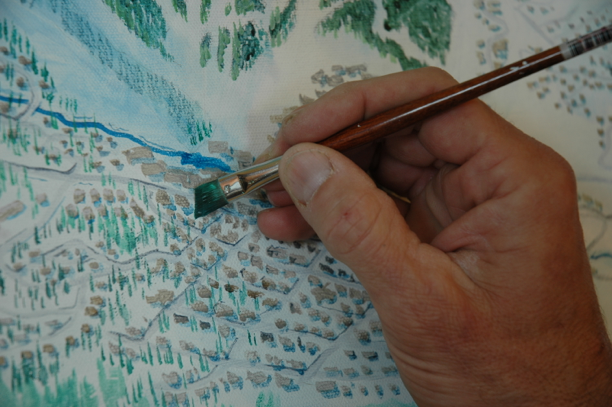
Time to stroke thousands of little, tiny trees. I start with just concentration of colors to establish the dense areas versus the gladed areas.
Once I get most of the treed areas filled in, I like to check the alignment of the trail lines. It’s important that the fall-lines and trail junctions line up.
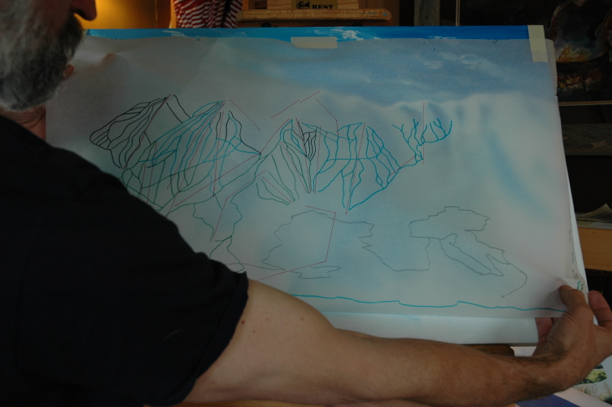
I lay a piece of tracing paper over the canvas and lay out the trail lines in marker: blacks, blues, greens and red for the lifts.
Here I can see which areas need to be filled in and the areas to leave open.
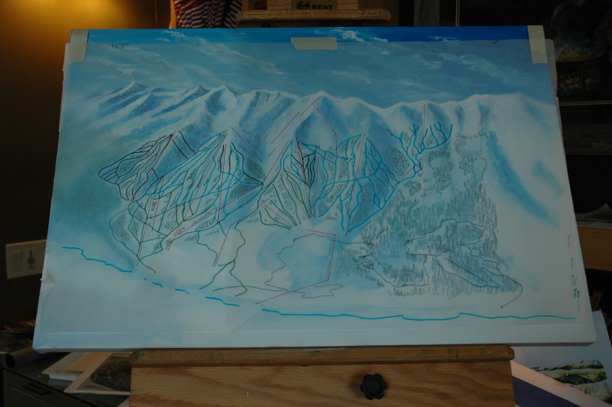
I’m starting to add some details, but not too much yet, adding some ochres and umbers for the windscoured ridges and light gray for the major roads.
Time to start adding the buildings, neighborhoods and town. I parked my laptop close by and used a little Google Earth action to see some specific road alignments and building concentration.
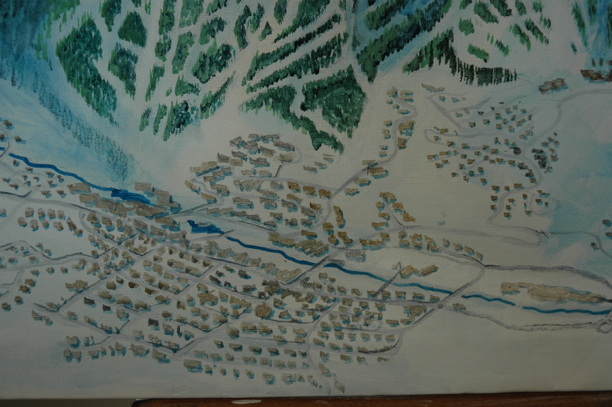
I put the buildings in…
…and then plant some trees around them. I use a number of brushes for trees, but one of my favorites is an angled shader held upside-down.
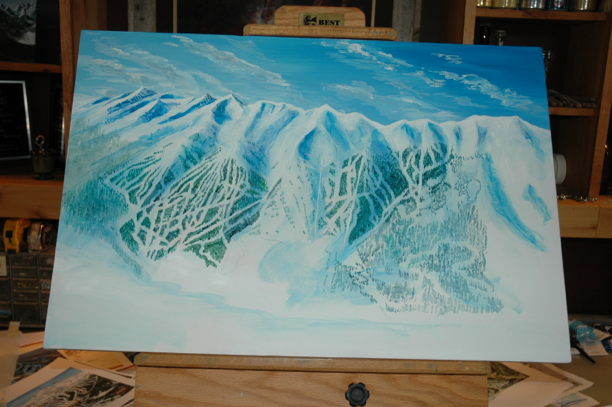
O.K. now it’s starting to come together! One of the tricks of any successful trail map is to ensure that the areas that people would recognize — are indeed recognizable; that the overall map “feels right” to the user; and most important, that the navigation actually works!
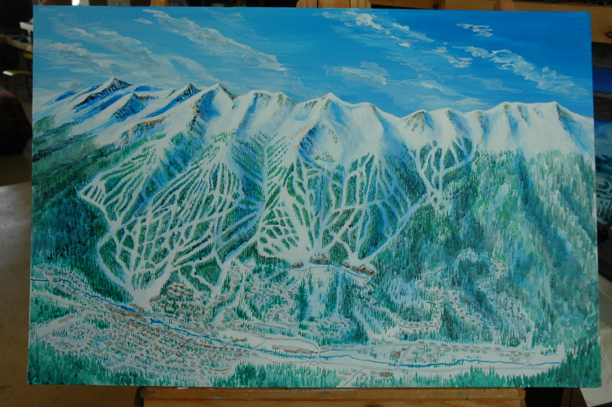
My brushwork is much looser than many other map artists, but the critical alignments and mapping accuracy are very tight.
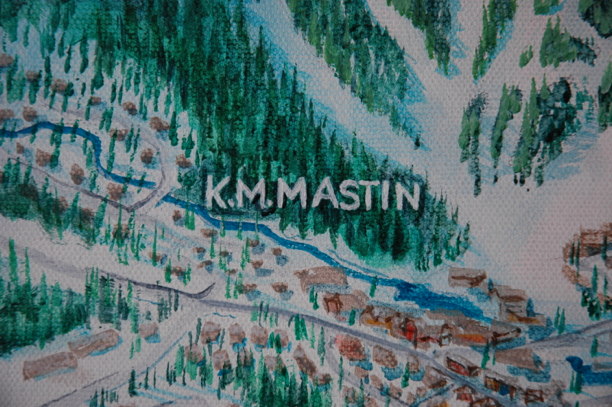
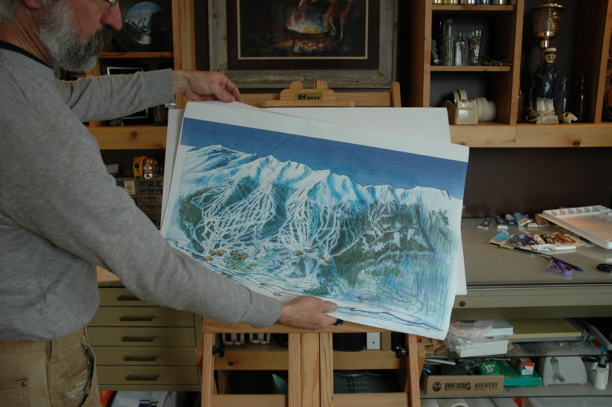
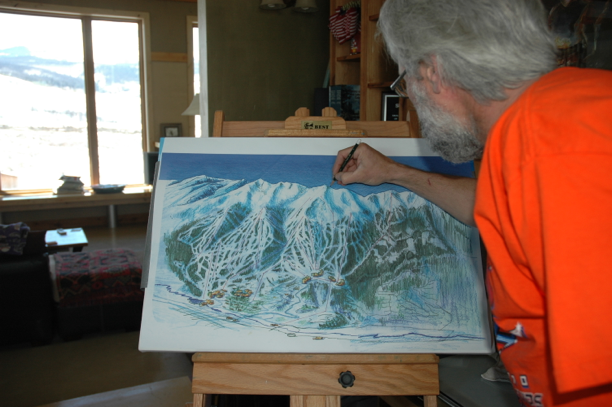
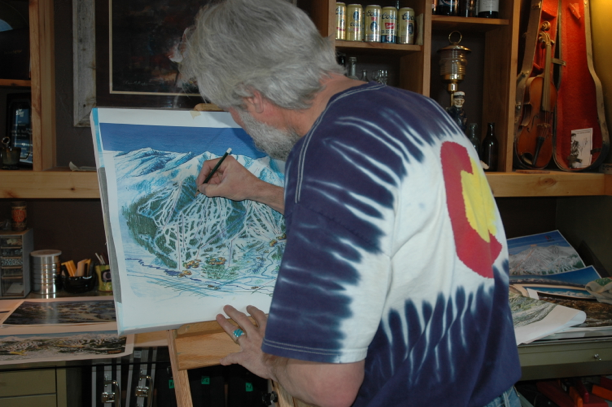
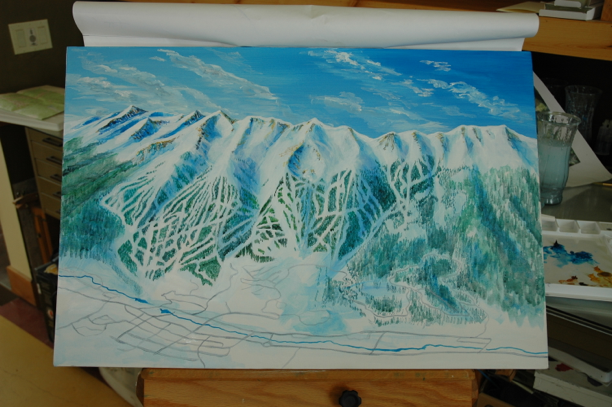
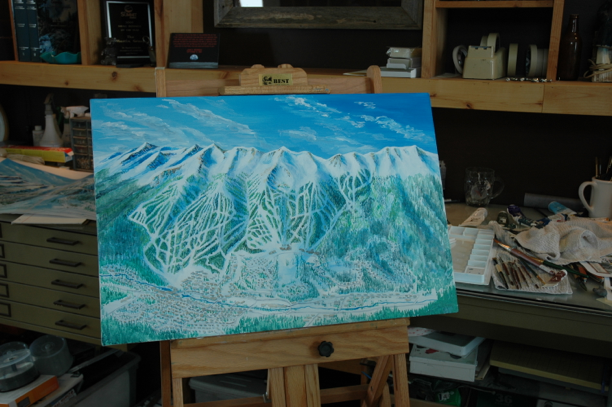
Once I’m confident the painting is complete it’s time to sign! I’m a bit superstitious about it. The painting’s not done until I sign it, and once I sign it—it’s done! I don’t like to go back and make adjustments after that. “Signature” is probably a misnomer because my signature is cursive, but since the art needs to be read (in order to pick up new commissions) it needs to be easily legible, so I use the printed signature.
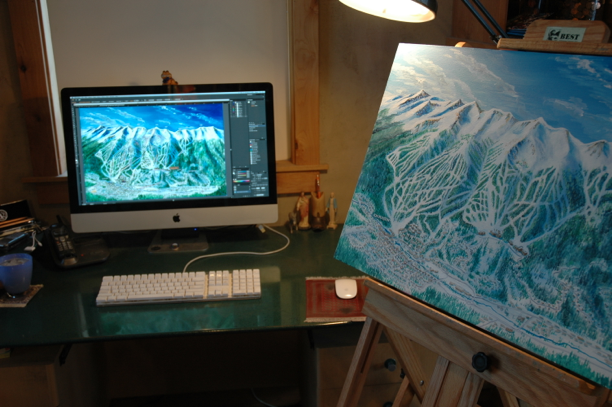
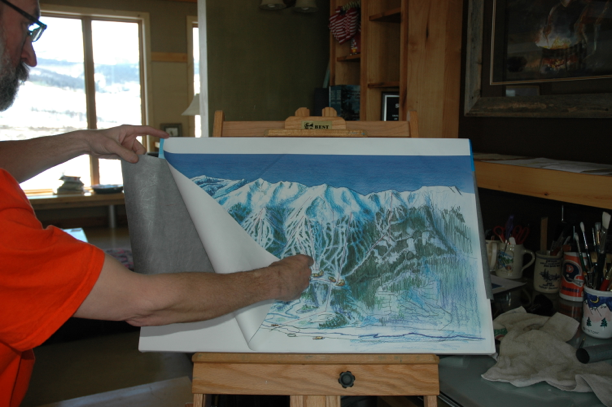
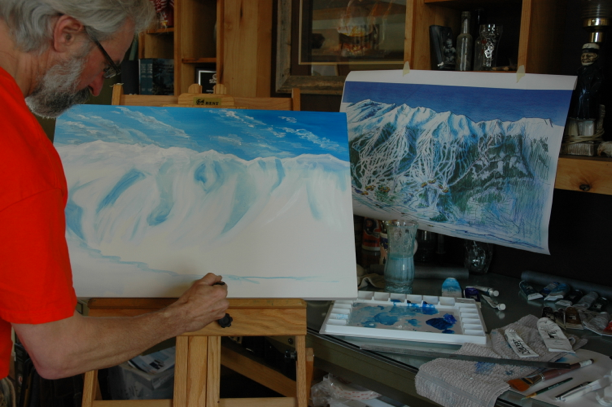
Time to get to the computer and finish this puppy up! I scanned it in now it’s time to color correct the image.

I’ll print it out, cut a swatch, lay it over the painting—make an adjustment repeat that…
… until I have it right!
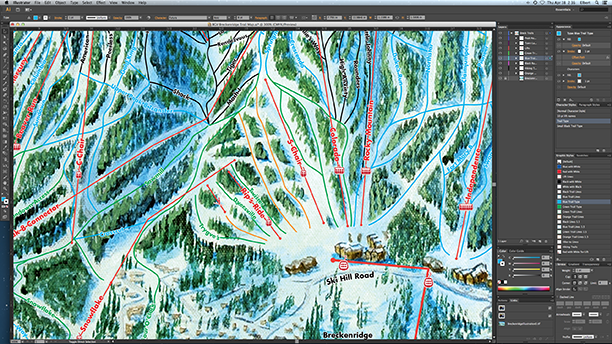
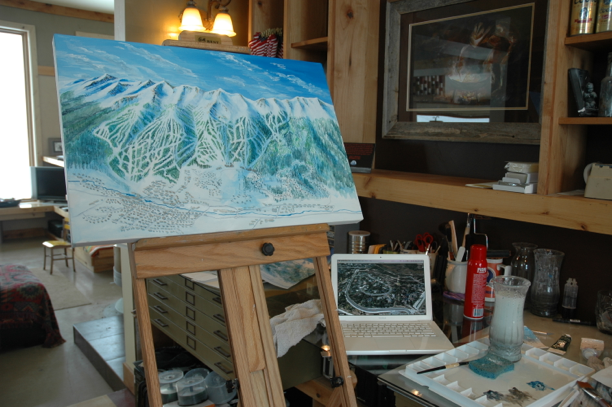
In Adobe Illustrator I add the overlays and labels to match my art.
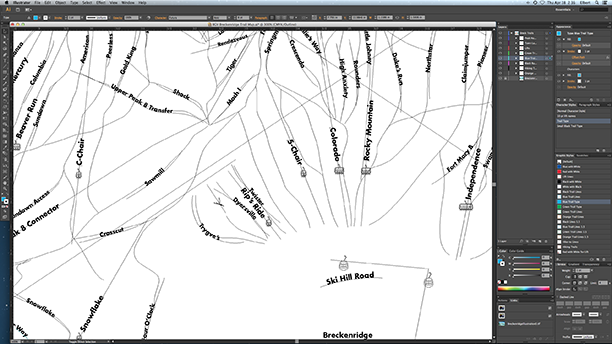
Here you can see the vector lines (which are scalable for use at very large sizes).
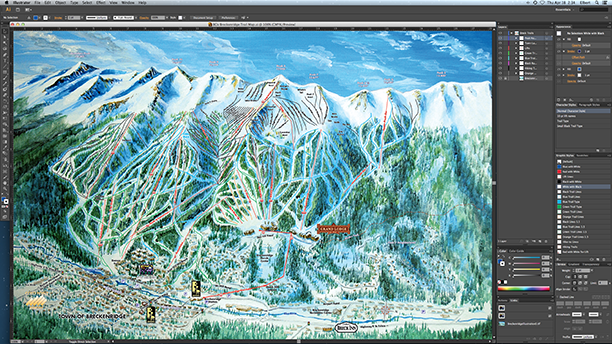
Now that everything is in place…
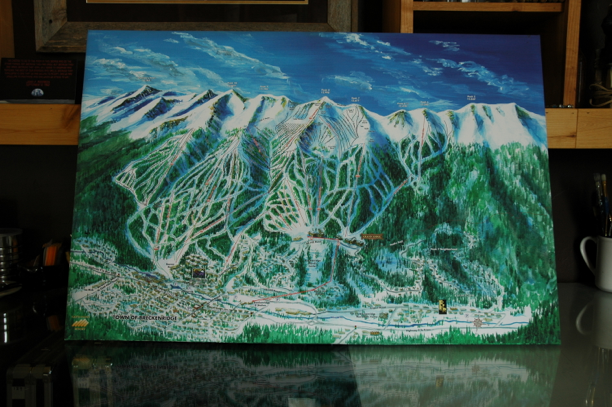
…I’ll print a nice, big canvas, stretch it, and DONE!
It’s beer-thirty!
Tagged with: Illustration, Kevin Mastin, Ski Trail Map